
There’s more to keeping the outside of your house in good shape and making it look better than just painting it. Pressure washing is an important step that is often skipped before painting, but it can have a big effect on how well the job turns out. Cleaning the surfaces properly before painting not only makes them look better but also makes sure that the paint sticks better and lasts longer. We will walk you through each step of the process of adding pressure washing to your house painting project in this detailed guide.
Understanding The Importance Of Pressure Washing
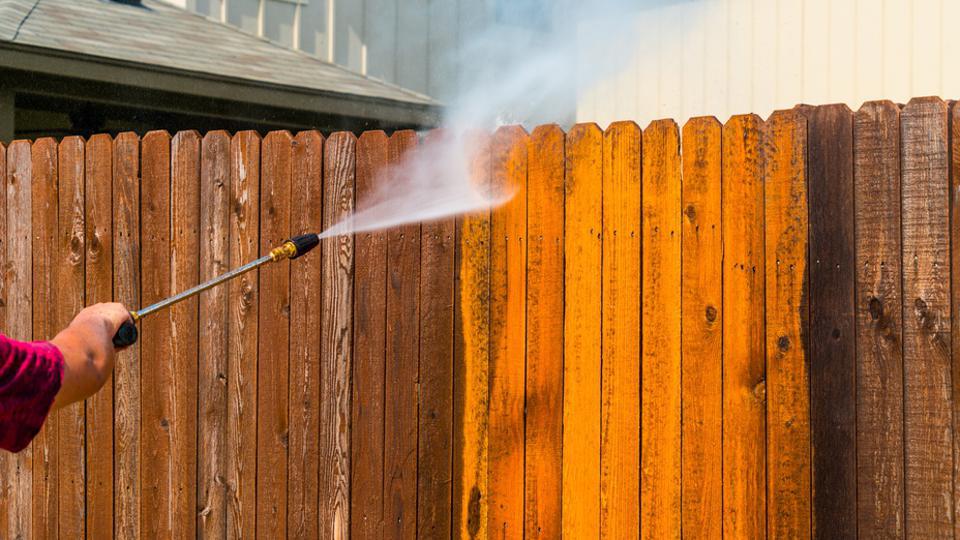
High-pressure water is used in pressure washing, which is also called power washing, to clean the outside of things by getting rid of dirt, grime, mold, mildew, and other pollutants. These surfaces can include siding, brick, stucco, concrete, wood, and even metal. The primary benefits of pressure washing salem before painting include:
Surface Preparation: Removes dirt, dust, pollen, and other debris that can affect paint adhesion.
Mold And Mildew Removal: Gets rid of fungus that can make paint peel or change color over time.
Improved Aesthetics: Restores the original appearance of surfaces, making them look cleaner and brighter.
Enhanced Durability: Helps paint adhere better and last longer, protecting your home against the elements.
Step 1: Assessing The Surface
Check out the areas you want to paint before you start pressure washing them. Look for signs of dirt buildup, mold, mildew, peeling paint, and any areas that might need special attention. Different surfaces may require varying pressure settings and techniques to avoid damage.
Step 2: Gathering The Right Equipment
To effectively integrate pressure washing into your painting project, gather the necessary equipment:
- Pressure Washer: Choose a pressure washer suitable for residential use with adjustable pressure settings (typically between 1500 to 3000 PSI for most home applications).
- Nozzles: Different spray nozzles (such as 15-degree, 25-degree, and 40-degree) for varying spray patterns and pressure levels.
- Cleaning Solutions: Biodegradable detergents or cleaners formulated for pressure washers, especially for removing mold and mildew.
- Safety Gear: To keep yourself safe from dirt and cleaning chemicals, wear safety glasses, gloves, and the right clothes.
Step 3: Preparing The Area
Before starting the pressure washing process, take the necessary precautions:
- Cover Plants and Delicate Surfaces: Use plastic sheeting or tarps to protect plants, light fixtures, and other delicate surfaces from water and cleaning solutions.
- Clear the Area: Remove obstacles such as outdoor furniture, decorations, and vehicles from the work area.
Step 4: Pressure Washing Technique
Now, let’s dive into the step-by-step process of pressure washing:
4.1. Setup And Safety Checks:
- Make sure all the connections on the power washer are tight before using it.
- Check the oil levels and fuel (if using a gas-powered washer) before starting.
4.2. Adjusting Pressure And Nozzle:
- Start with a low-pressure nozzle (25 or 40-degree) to avoid damaging the surface.
- Test the pressure on a small inconspicuous area to ensure it’s effective without causing damage.
4.3. Applying Cleaning Solution:
- If dealing with heavy mold or mildew, apply a biodegradable cleaning solution from bottom to top using a low-pressure nozzle.
- Allow the solution to sit for a few minutes (as per manufacturer’s instructions) to loosen dirt and contaminants.
4.4. Pressure Washing Technique:
- Begin pressure washing from the top of the surface, working your way down in smooth, overlapping strokes.
- Maintain a consistent distance (usually 1 to 2 feet) between the nozzle and the surface to avoid streaks or damage.
- Clean in sections, ensuring thorough coverage and rinsing off the cleaning solution completely.
4.5. Rinse And Dry:
- Once the entire surface is cleaned, switch to a clean water nozzle and rinse thoroughly from top to bottom.
- Let the surface dry all the way through before you start painting. Depending on the weather, this could take anywhere from 24 to 48 hours.
Step 5: Inspecting And Repairing
After pressure washing, inspect the surfaces for any remaining dirt, mildew, or damage that may require further attention:
- Address any areas where paint is peeling or surfaces that need repair before painting.
- Allow ample time for surfaces to dry completely before applying primer or paint.
Step 6: Painting Preparation
With the surfaces clean and dry, you’re now ready to proceed with painting:
- Choose high-quality exterior paint and primer suitable for the surface material.
- Apply primer if necessary to promote better adhesion and enhance paint durability.
- Follow the house painters New York guidelines for paint application, including drying times and temperature requirements.
Step 7: Painting Techniques
Apply paint using brushes, rollers, or sprayers, ensuring even coverage and proper technique:
- Work in manageable sections, blending edges to avoid visible seams.
- For a better finish, use several thin coats instead of one thick one.
- As the paint manufacturer tells you, allow enough time for each coat to dry.
Step 8: Finishing Touches And Cleanup
Once the painting is complete, take care of the finishing touches and cleanup:
- Remove any protective coverings from plants and delicate surfaces.
- Clean and properly store pressure washing equipment for future use.
- Dispose of paint and cleaning materials responsibly according to local regulations.
Conclusion
Integrating pressure washing into your house painting project is a crucial step toward achieving a durable and aesthetically pleasing exterior. By following these step-by-step guidelines, you can effectively prepare surfaces, ensure better paint adhesion, and enhance the longevity of your paint job. Remember, proper preparation with pressure washing not only improves the appearance of your home but also protects it from environmental damage, ensuring years of enjoyment and curb appeal.
Keep an eye for more news & updates on Gossips!